
The Cast Creation tool generates a cast from a dental mesh to obtain a stable working model.
Allows you to create different types of cast:
- Solid: solid cast.
- Hollow: hollow cast.
- Honeycomb: cast with a honeycomb pattern.
Step by step
1️⃣ Select the mesh you want to skirt and open the skirting tool by clicking the first button in the IA Protocols bar. The AI will automatically select the region to preserve for the plinth.

2️⃣ If necessary you can enlarge or reduce it. You can help yourself with the brush by adding areas by clicking or removing areas with Ctrl + click.

3️⃣ Adjust the orientation of the cast by holding Ctrl and moving the controls, as shown in the video.

Also adjust the height of the plinth by dragging the plane with the arrow or by defining a specific height in millimeters from the numerical field.
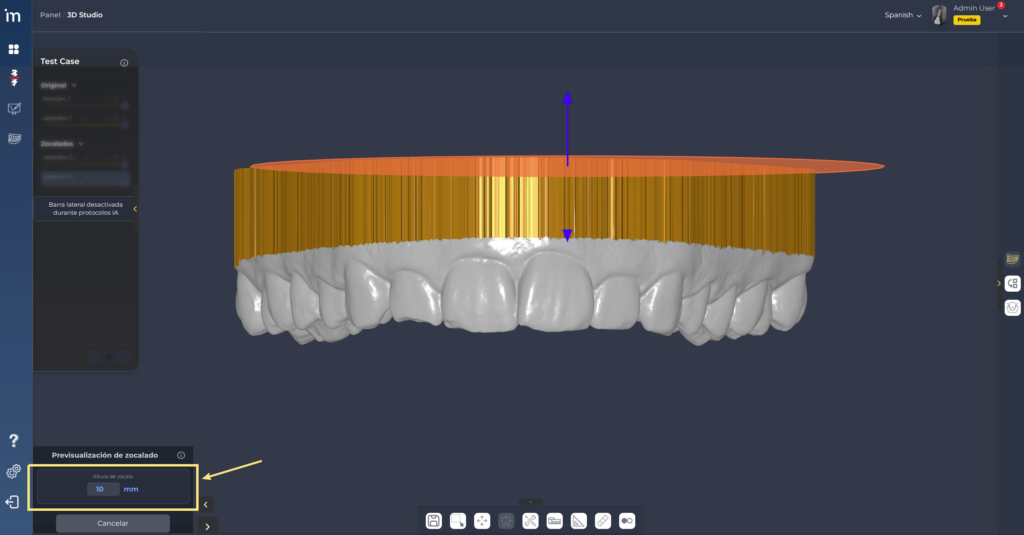
4️⃣ Choose the type of cast. If you have selected the hollow or honeycomb type, configure the thickness of the wall.

5️⃣ The cast will be generated automatically. Review the final preview and press Apply cast to create the definitive cast. If it doesn’t convince you, go back, adjust parameters and repeat.

ℹ️ Good practices
- Review the result from multiple views before confirming.
- Define the preserved surface well before touching parameters, trying to avoid disconnected regions.
- Adjust the orientation of the plane first and then the height.
- Start with solid plinth to validate direction/volume and then test the gap or honeycomb if you need to lighten.