
Below we explain how to start a 3D design in the software MovumStudio®.
To access this module it is necessary to have the files you want to work with loaded in the Case Manager (STL, waxup…).
There are two ways to access 3D Studio: from a Smile Design case or by directly accessing the module from the drop-down menu on the left.
Access from Smile Design
1️⃣ When finishing a case in Smile Design, the button will appear on the last screen View in 3D. Clicking on it will open 3D Studio.

2️⃣ This button takes you directly to uploading the patient’s 3D files. By default, it selects the Smile design study that includes the STL of the upper jaw, the resulting wax-up and the patient’s smile photograph.
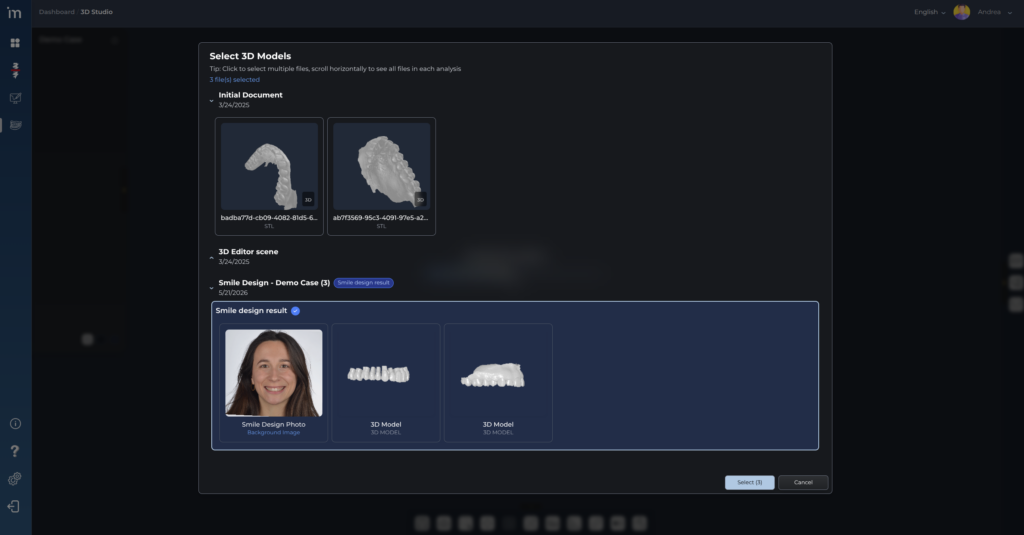
When opening the result of the Smile design, the STL and the wax-up will be projected onto the image and, if necessary, the alignment of the STL with the image can be corrected.
The STL can be translated or rotated and the image can be translated or scaled uniformly.
If you have moved the STL or the image too much, clicking the Center view button centers the camera again. This button will then be present in the sidebar next to the image.
Access from the drop-down menu
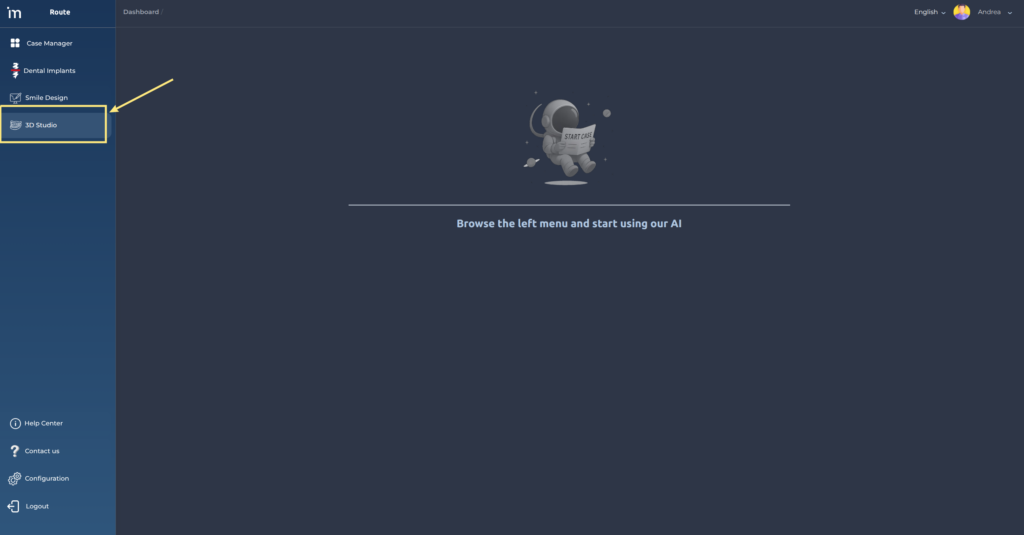
1️⃣ Navigate to the drop-down menu on the left and click on the module 3D Studio.
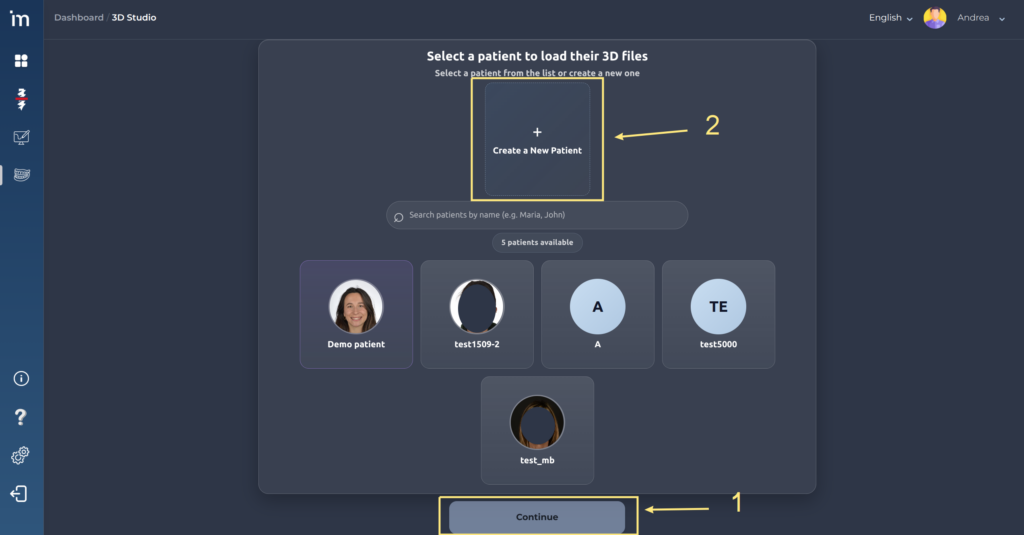
2️⃣ Select a patient and click Continue. If you wish, or if you do not have any patients yet, you can create a new one by clicking on Create a new patient.
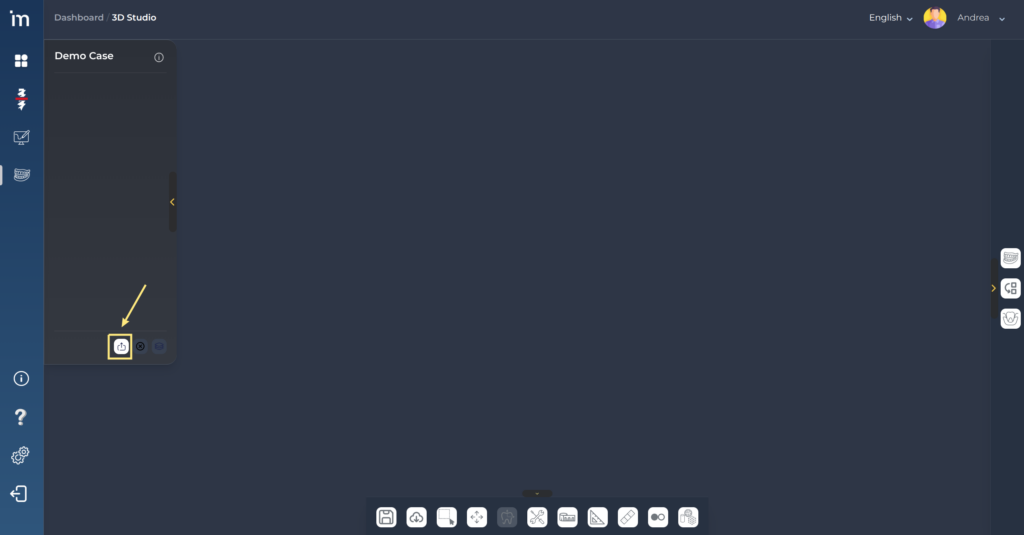
3️⃣ Click the button Upload files located in the left sidebar. Any files that have been uploaded for that patient from the Case Manager will be displayed.
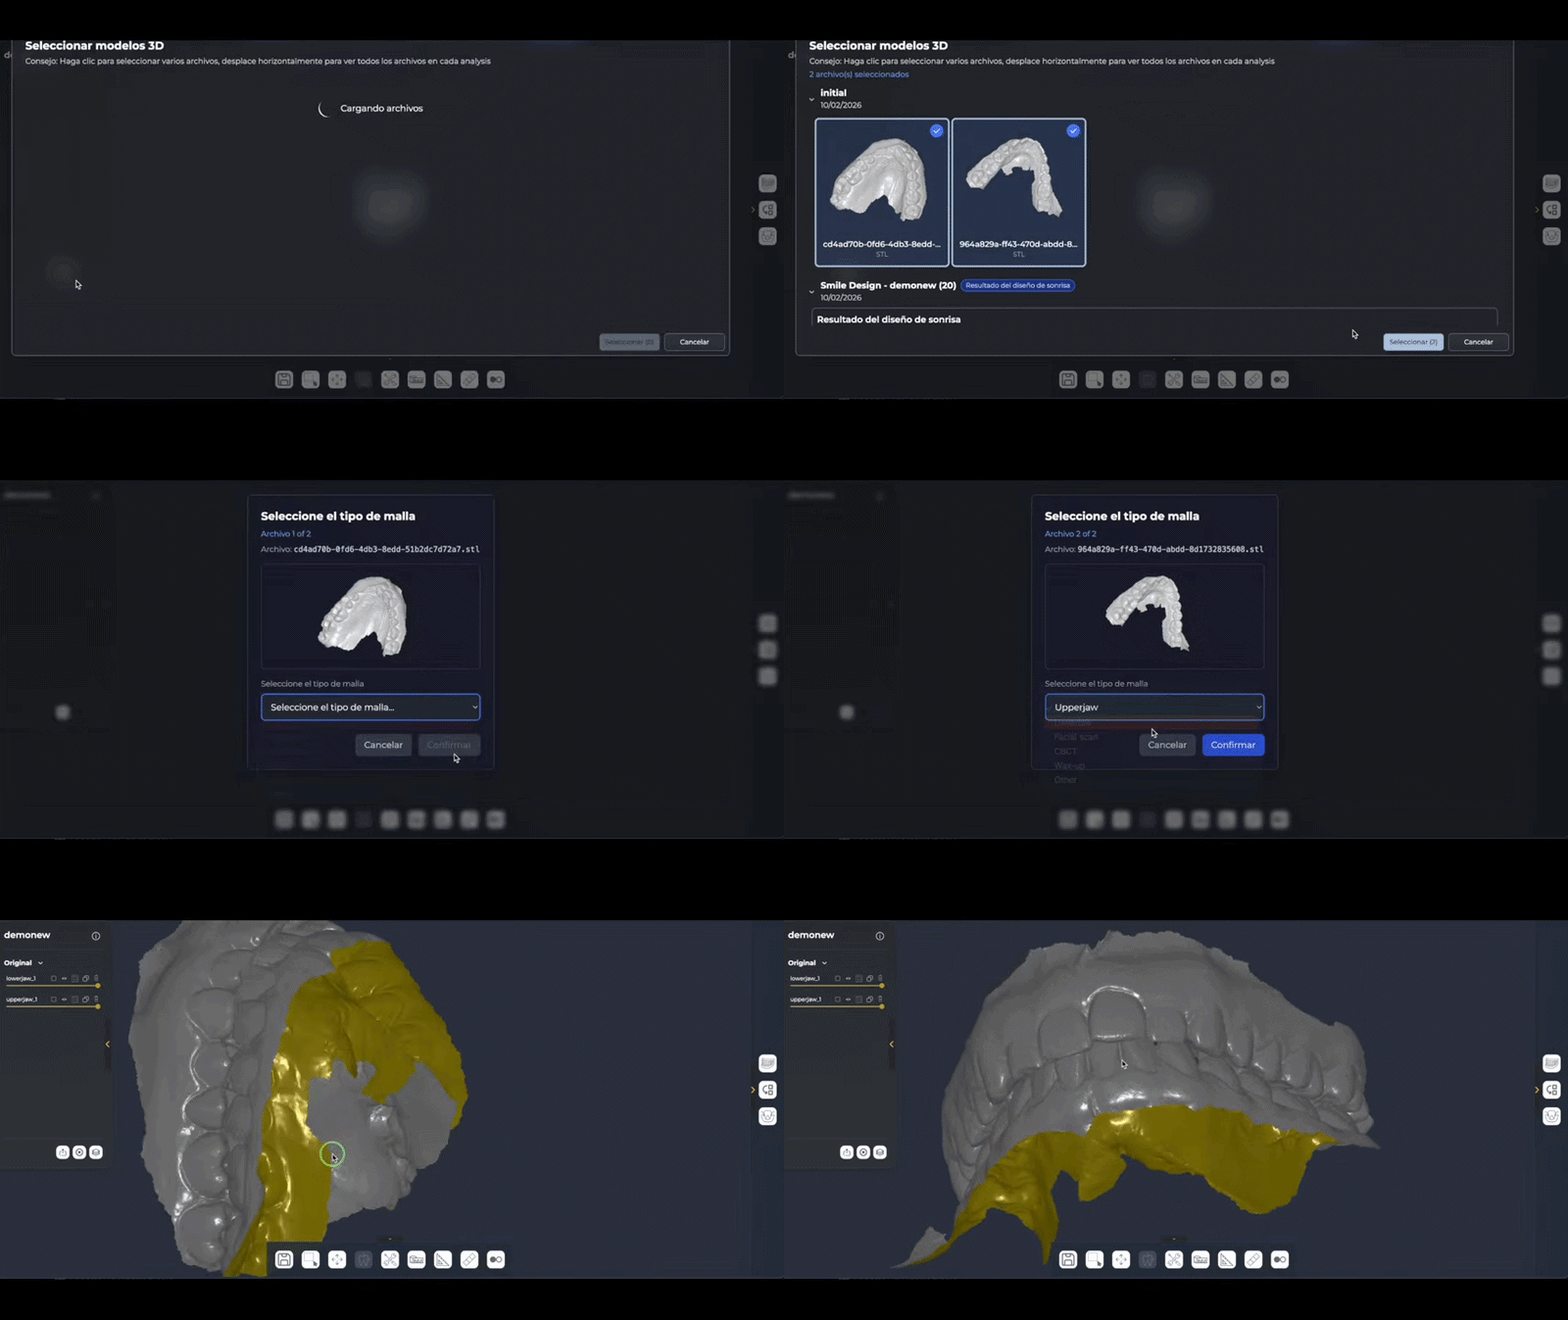
4️⃣ As shown in the following video, select the files you want to upload and click Select. For each selected file, indicate what type of file it is. If the files have not been previously segmented, they will be segmented at that time.
Sidebar
From here the user organizes the scene: what meshes there are, how they are grouped, which ones are visible, which ones are selected and what properties each one has.
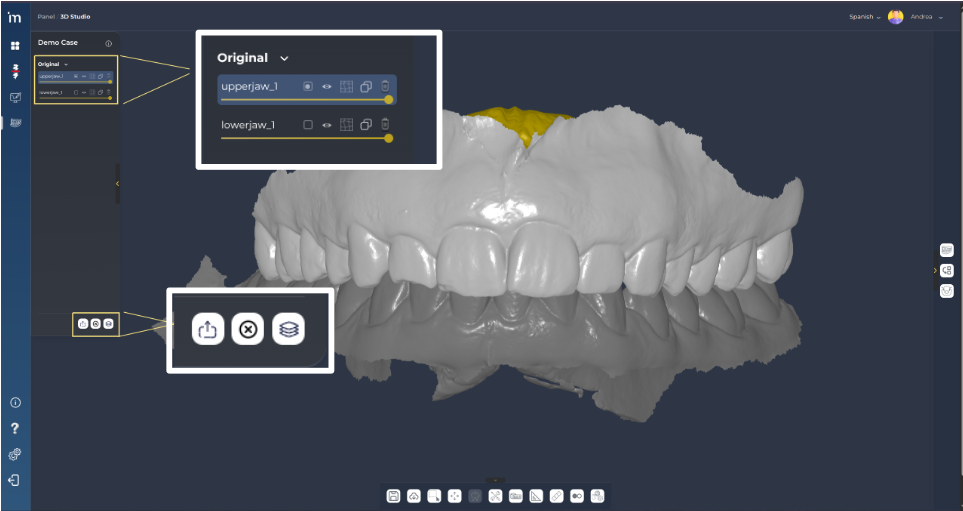
Buttons
At the bottom there are three buttons:
- Load files– Opens a popup that shows all the files in the Case Manager for that patient and allows you to load them into the scene.
- Clear Scene: Removes all meshes from the scene.
- Create group– Allows you to group multiple meshes into a new group. More information at Groups. Once a group is created, any mesh can be moved to that group and the meshes containing it can be moved to their original group.
The uploaded files are displayed by categories: original, waxed, anatomy, baseboards…
Tights
As seen in the following video, each mesh has some controls:
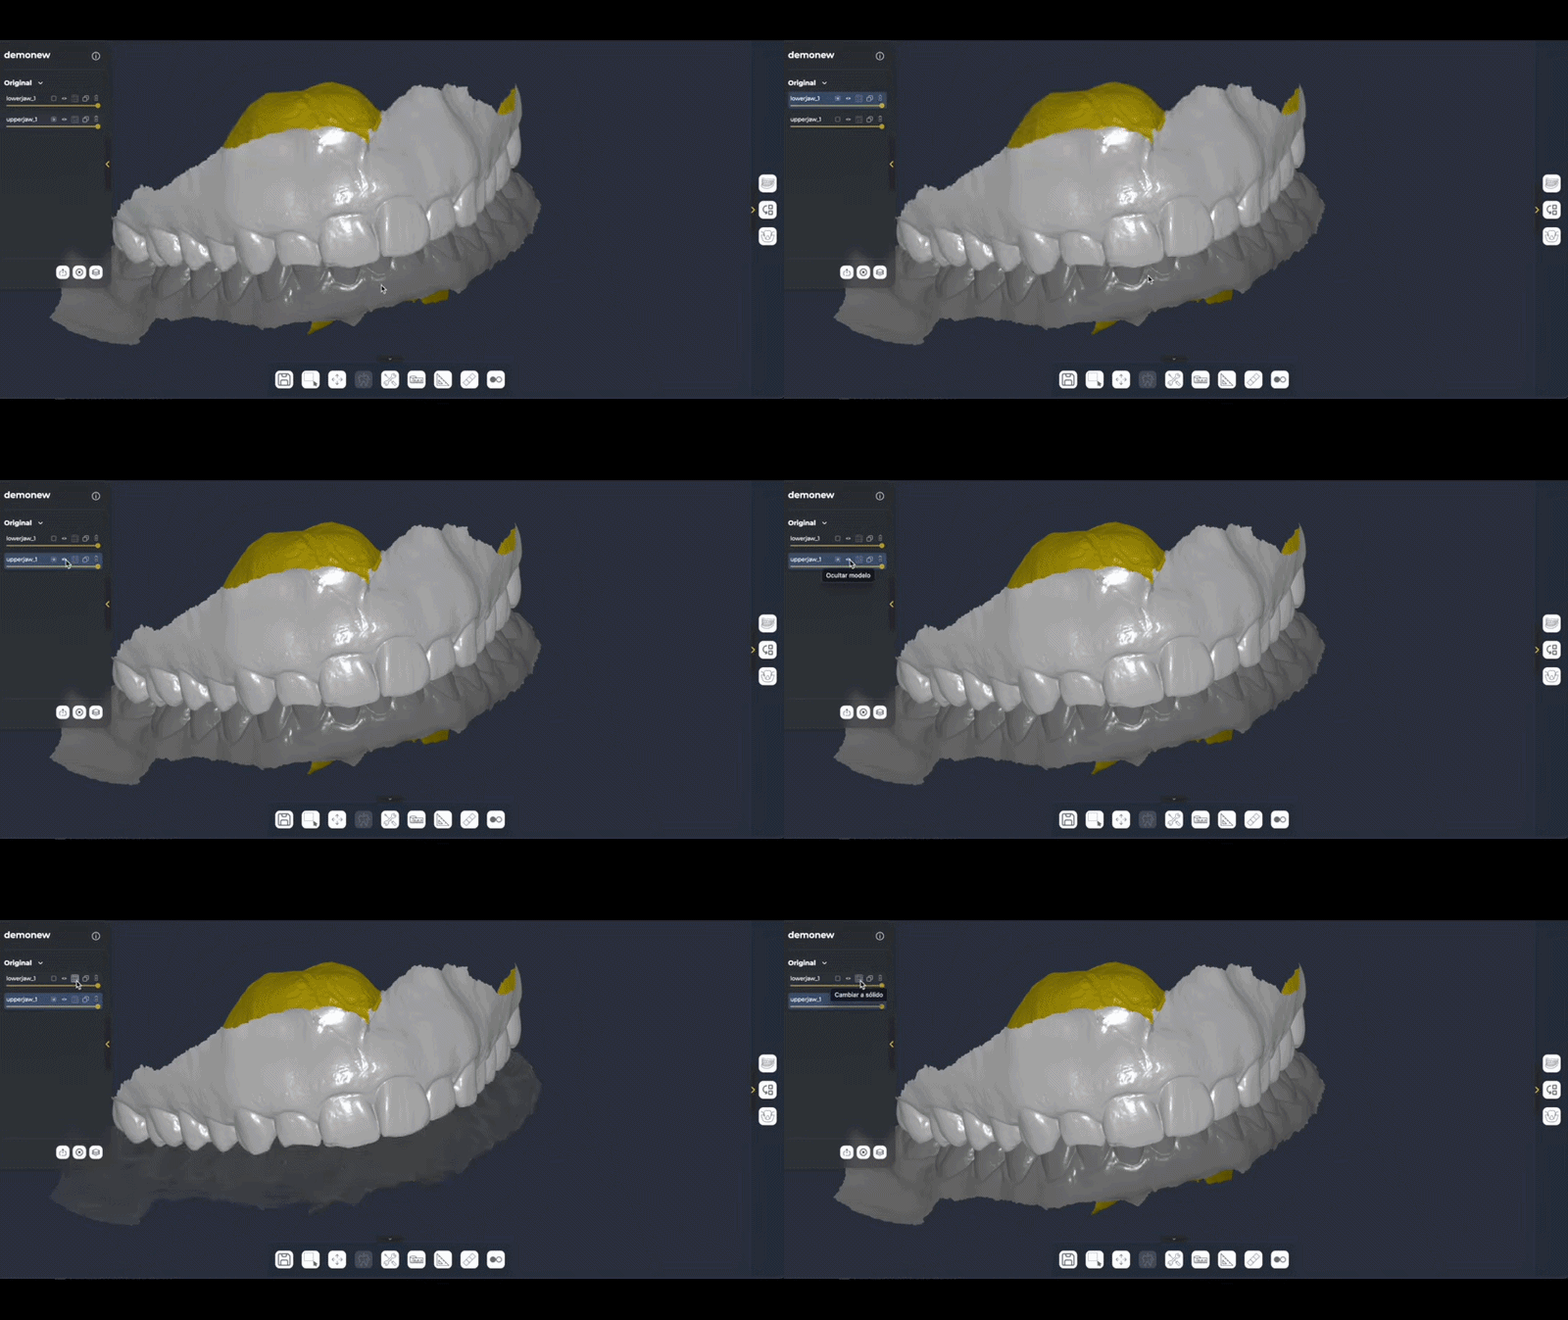
- Selection: Select or deselect the mesh by highlighting it white and yellow or gray and yellow respectively.
- Visibility– Hides or shows the mesh.
- Solid/wireframe– Displays the solid mesh or wireframe.
- Double– Creates a copy of the mesh and saves it in the same group as the original mesh.
- Opacity (slider): modifies the opacity of the mesh.
- Eliminate: Removes the mesh from the scene.
- Front view(images only): Place the camera frontally.
- Renowned: by double clicking on the name of the mesh you can rename it.
Controls
| Action | Key |
|---|---|
| Open/close Transform/Deform | T
|
| Open/close Transform/Deform | T
|
| Open/close Sculpt | S
|
| Open/close Selection tool | V
|
| Open/close Transform/Deform | T
|
| Open/close Repair mesh | R
|
| Open/close Transform/Deform | T
|
| Open/close Measure | M
|
| Open/close Measure in 2D section | P
|
| Open/close Wax | W
|
| Close active tools/protocols | Enter
|
| Undo global | Ctrl+Z / Cmd+Z
|
| Reverse normals | F
|
| Focus the camera on the scene | 0
|
| Action | Mouse |
|---|---|
| Orbit/move view in scene | Left click and drag |
| Zoom in / zoom out a la escena | Roll mouse wheel |
| Breakdown alternative | Click the mouse wheel and drag |
| Alternate rotation | Right click and drag |
Tools
It is the manual editing menu of the 3D model.
Here are the tools to work directly on the meshes in the scene.

From left to right they are:
- Save scene
- Download STL
- Selection tool
- Transform/Deform
- waxed
- Sculpt
- Measure
- Measure in 2D section
- Repair mesh
- Boolean operations
- Add primitive shapes
You can see this section explained in detail HERE.
AI protocols
This menu is for guided clinical/technical work flows.
It groups together more “directed” processes that usually have business stages and logic: